


create per diem expense
Configuring Per Diem in a workspace
Per Diem is available as a feature under the Spend section within More Features in the workspace settings. Once enabled, it will appear as a dedicated menu item in the workspace settings LHN.
Uploading and exporting Per Diem rates
Admins can manage Per Diem rates by uploading or exporting data.
- To upload rates, use the Import spreadsheet option.
- To download existing rates, use the Download CSV option.
Both options are accessible from the three-dot menu in the page header.
Editing or deleting Per Diem rates
Each Per Diem rate is listed as an individual line item. Admins can:
- Select a single rate or multiple rates.
- Edit a rate by clicking on it and adjusting the details.
- Delete rates using the “X selected” drop-down menu.
Setting the default Per Diem category
Admins can assign a default category to Per Diem expenses:
- Click the Settings button in the top-right corner.
- In the right-hand panel, select Default category.
- Choose from the available categories.
FAQ
Why don’t I see the Per Diem option when submitting an expense?
The Per Diem option is only available if you are a member of a workspace with Per Diem enabled. If you are submitting an expense outside a workspace (such as in a group chat or DM), the option will not appear.
Can I bulk-edit or delete Per Diem rates?
Yes, you can select multiple rates at once and apply bulk actions such as editing or deleting.
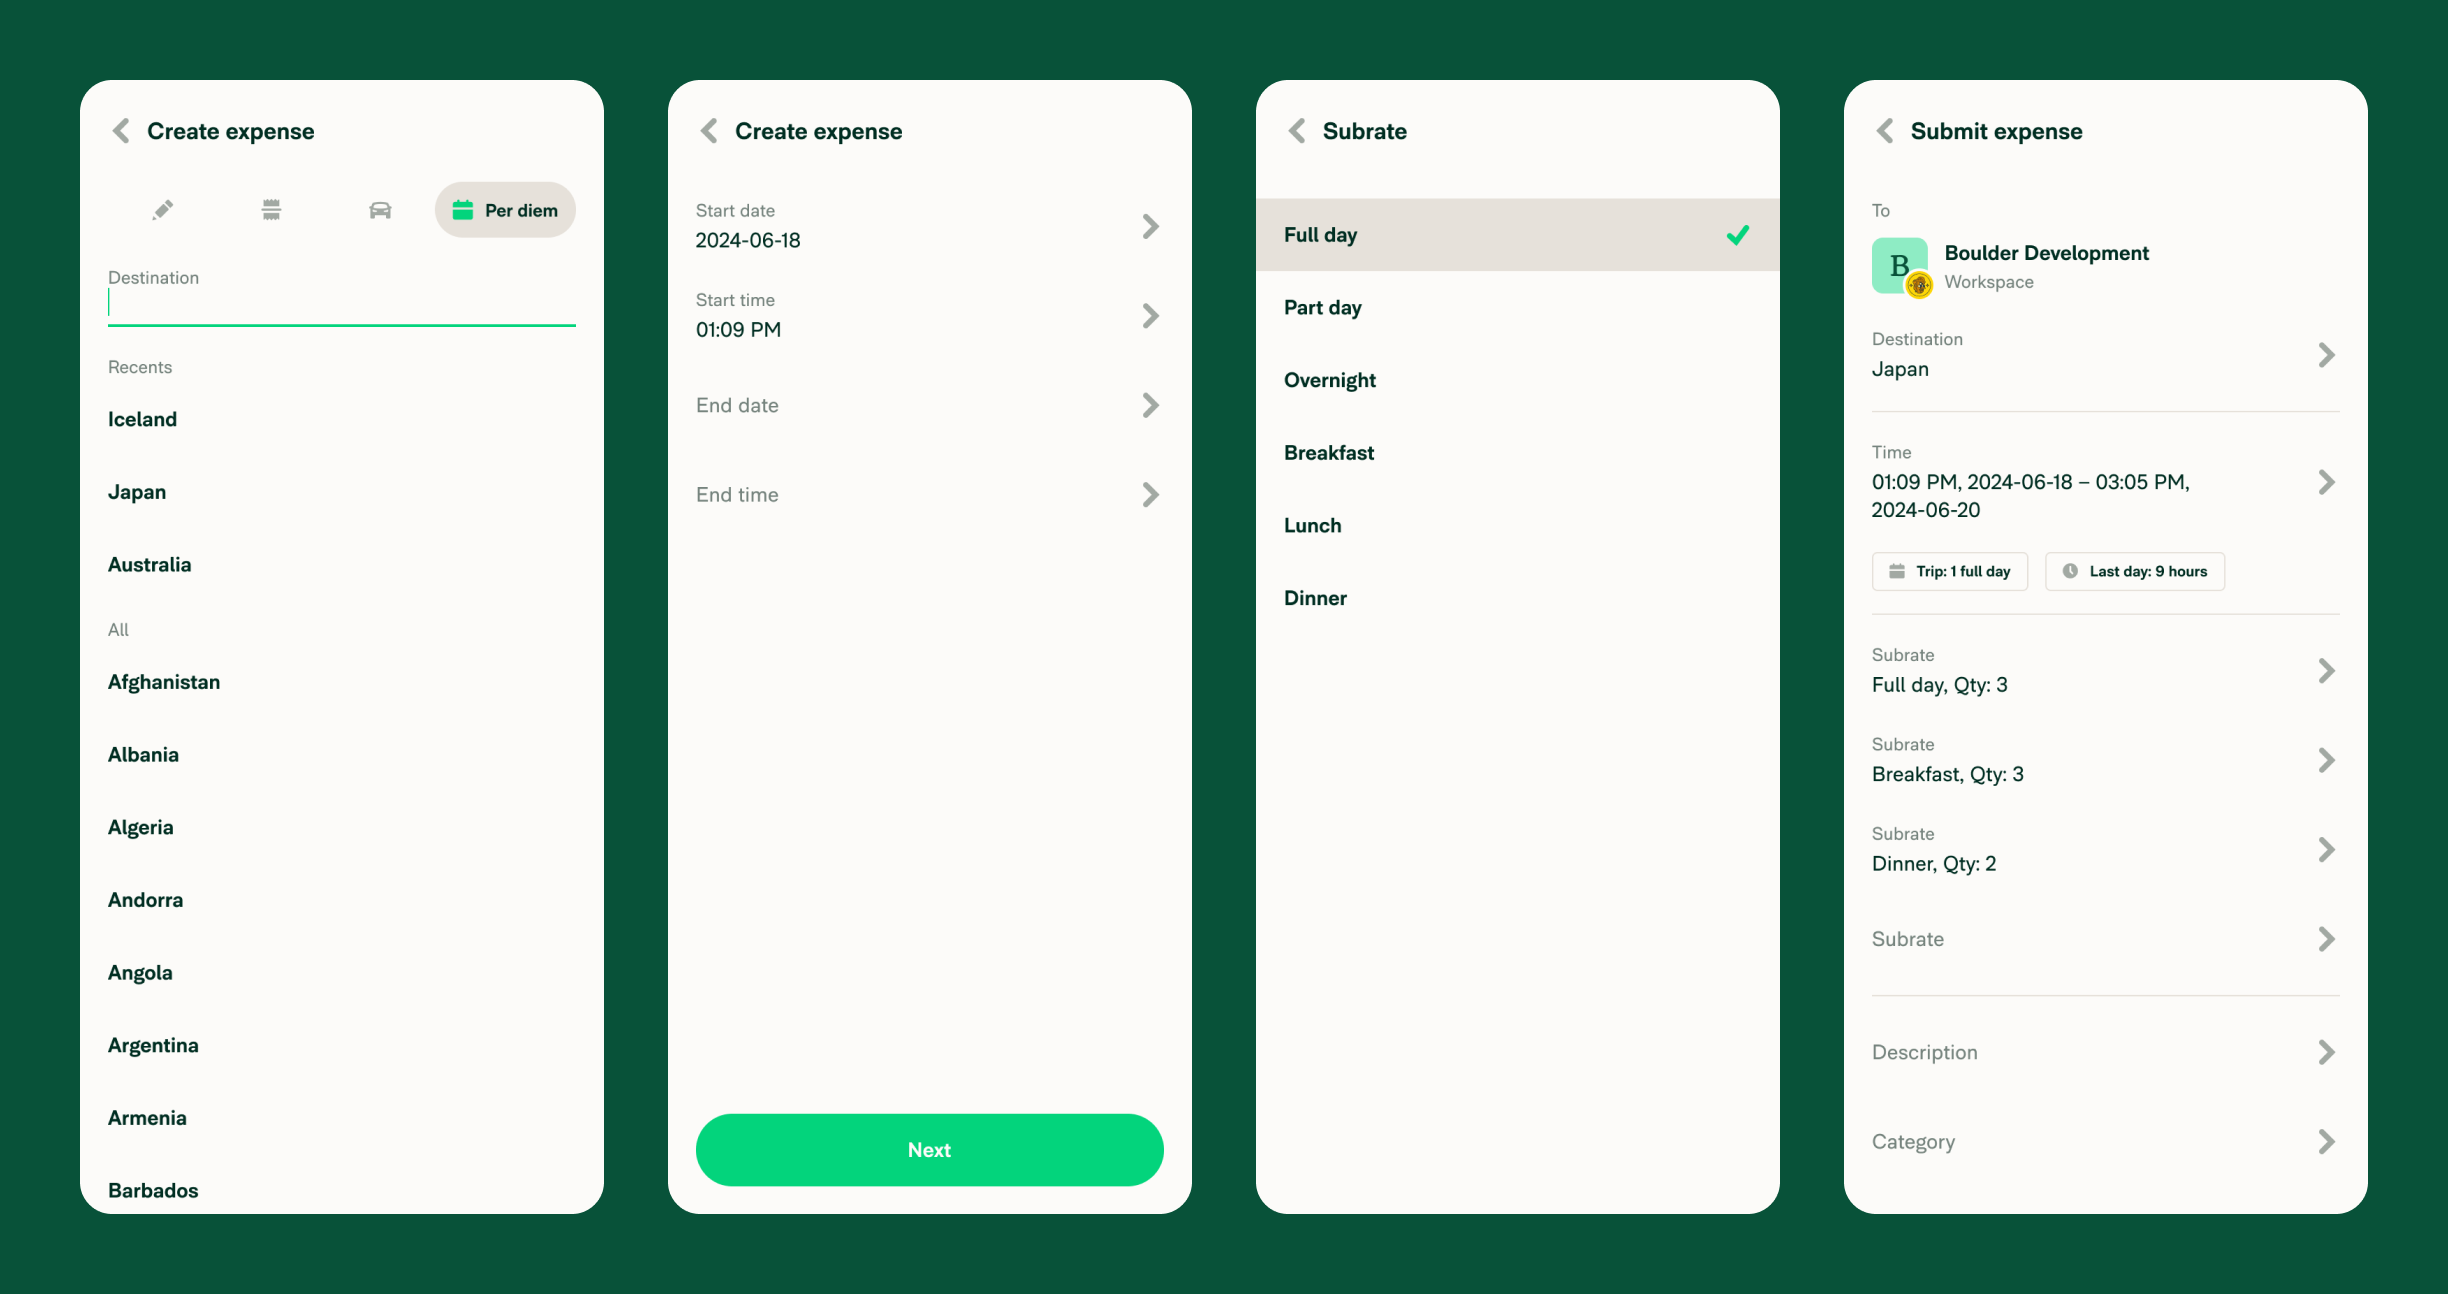
How to create a Per Diem expense
If your workspace has Per Diem enabled, you can create a Per Diem expense directly from the Submit Expense flow. Follow the steps below to complete the process.
Submitting a Per Diem expense
1. Open the expense submission flow
- Tap Submit Expense from the Global Create menu.
- If your workspace has Per Diem enabled, you’ll see the Per Diem option.
Note: If you’re submitting an expense from a group chat or DM (outside a workspace), you won’t see the Per Diem option.
2. Select a workspace
- If you are a member of multiple workspaces with Per Diem enabled, select the workspace you want to submit the expense under.
- If you only belong to one workspace with Per Diem enabled, this step will be skipped.
3. Choose a destination
- Select the country or region where the Per Diem expense applies.
4. Enter time details
- Set the Start Date and Start Time.
- Set the End Date and End Time.
5. Select your Per Diem sub-rate
- Choose a sub-rate (e.g., Full day, Breakfast, Dinner).
- Enter the quantity (e.g., the number of days or meals covered).
6. Review and adjust details
- You can go back and update any previous selections.
- Add more sub-rates if needed (e.g., if your trip includes multiple types of expenses).
- Optionally, add a category, tag, or description to your expense.
7. Submit the Per Diem expense
- Once everything is correct, tap Submit Expense.
Quick access to Per Diem expenses
If you create Per Diem expenses frequently, you can add them to the Quick Action Button (QAB) for faster access. The QAB helps surface your most common actions, making it easy to submit Per Diem expenses with fewer taps.
FAQ
Why don’t I see the Per Diem option when submitting an expense?
The Per Diem option only appears if you are a member of a workspace with Per Diem enabled. If you’re submitting an expense outside of a workspace (such as in a group chat or DM), this option won’t be available.
Can I create Per Diem expenses for multiple days?
Yes! When selecting your Start Date and End Date, you can add multiple sub-rates to cover different parts of your trip (e.g., Full day, Breakfast, Dinner).